Rag & Bone made this one. Now you can too.We understand Fall hasn't officially set in (85 degrees last Monday felt a tad out of place), but we assure you, it will happen. And when it does, thanks to today's trusty how-to, you--and your head--will be ready.
Most new knitters think a scarf is the best project to cut their teeth on. Little do they know: A hat is faster to finish and has some shaping with it, so that just when you start feeling comfortable--bam!--you learn a new technique. Of course, when finished it will also keep in 80% of your body heat. And you don't even need a fancy pattern--you just need these basic guidelines that we're about to give you. Ready? Your head is going to be so warm!
Materials
1. Yarn. You can use any fiber, any texture, whatever you want! Depending on its weight, you'll need somewhere in range of 100 yards--more for very thin yarns, less for chunky yarns, usually a single skein or ball will do the trick.
2. A pair of 16-inch circular needles. What size you use (this is the girth of the needles) will depend on your yarn. If you already own yarn that you'd like to use, you can bring it to a yarn shop and they'll help you sort it out.
3. A set of four or five double-pointed needles in the same size as your circular needle.
4. A fun little thing called ring markers, or just scrap yarn in a contrasting color to your main hat yarn.
You're now essentially halfway to a handknit hat. Ready to start knitting? Hit the jump for the step-by-step.
Instructions
1. Make a gauge swatch. This is how you'll make your hat the correct size. Cast on 16 stitches and knit about two inches. Bind off. Lay the swatch flat and measure how many stitches per inch you're getting.
2. Measure your head. Place the tape measure where the band of your hat will lie. If you have big hair and don't want your hat squishing it down, measure around the outside of your hair. The typical adult head size is 22-24 inches, so if you're making a gift, base your size on that general range.
3. Math time. Multiply your head circumference by the number of stitches per inch you're getting. So if you're using a worsted-weight yarn and getting 4.5 stitches per inch, and you have a 24-inch head, 24x4.5=108. That gets you in the ballpark of the number of stitches you want to cast on, but you want it to be a multiple of 11, so round up or down--whichever is closest.
4. Cast on your stitches on your 16-inch circular needles.
5. When they are all cast on, place your marker on the needle, or tie your scrap yarn on, and join the stitches being very careful not to twist them.
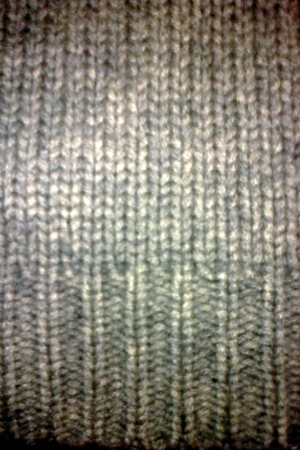 Stockinette stitch with ribbed edge6. Start knitting. If you knit every row when you're working in the round, it will come out as stockinette stitch and the edge will roll. If you want the edge to lie flat do a knit one stitch, purl one stitch rib. If you want a cuff at the bottom of the hat, rib 2-4 inches, whatever your preference. Then you're going to work (knit, rib, do some crazy pattern stitch--it's your world) the distance from the top of your ear to the crown of your head, generally about 8 inches.
7. Now it's time for that shaping technique we mentioned. Ready? Knit 9 stitches, then knit 2 together for this round. Then you're going to work a round plain. Then knit 8 stitches, knit 2 together. Then a row plain. Knit 7, knit 2 together. You get the idea. When it gets down to it, you'll just knit 2 together all the way around. You want to end up with 4 stitches left, give or take.
8. At some point in your decreases, you'll have too few stitches to go all the way around your circular needle, so you're going to switch to your double-pointed needles. The way these work is that you divide your stitches between three (or four) needles and knit on to the fourth/fifth.
9. Once you're down to your 4 or so stitches, you're going to cut your yarn, leaving a tail of 2 or 3 inches. Pull it through the remaining stitches and pull them together like a draw string. Tuck the tail inside and weave in your ends.
10. Congratulate yourself on making a hat. Wear it everywhere no matter the weather and tell anyone looking in the general direction of your head that you made your hat. That's the reason you did this, right?
--Layla Schlack
 Email tagged